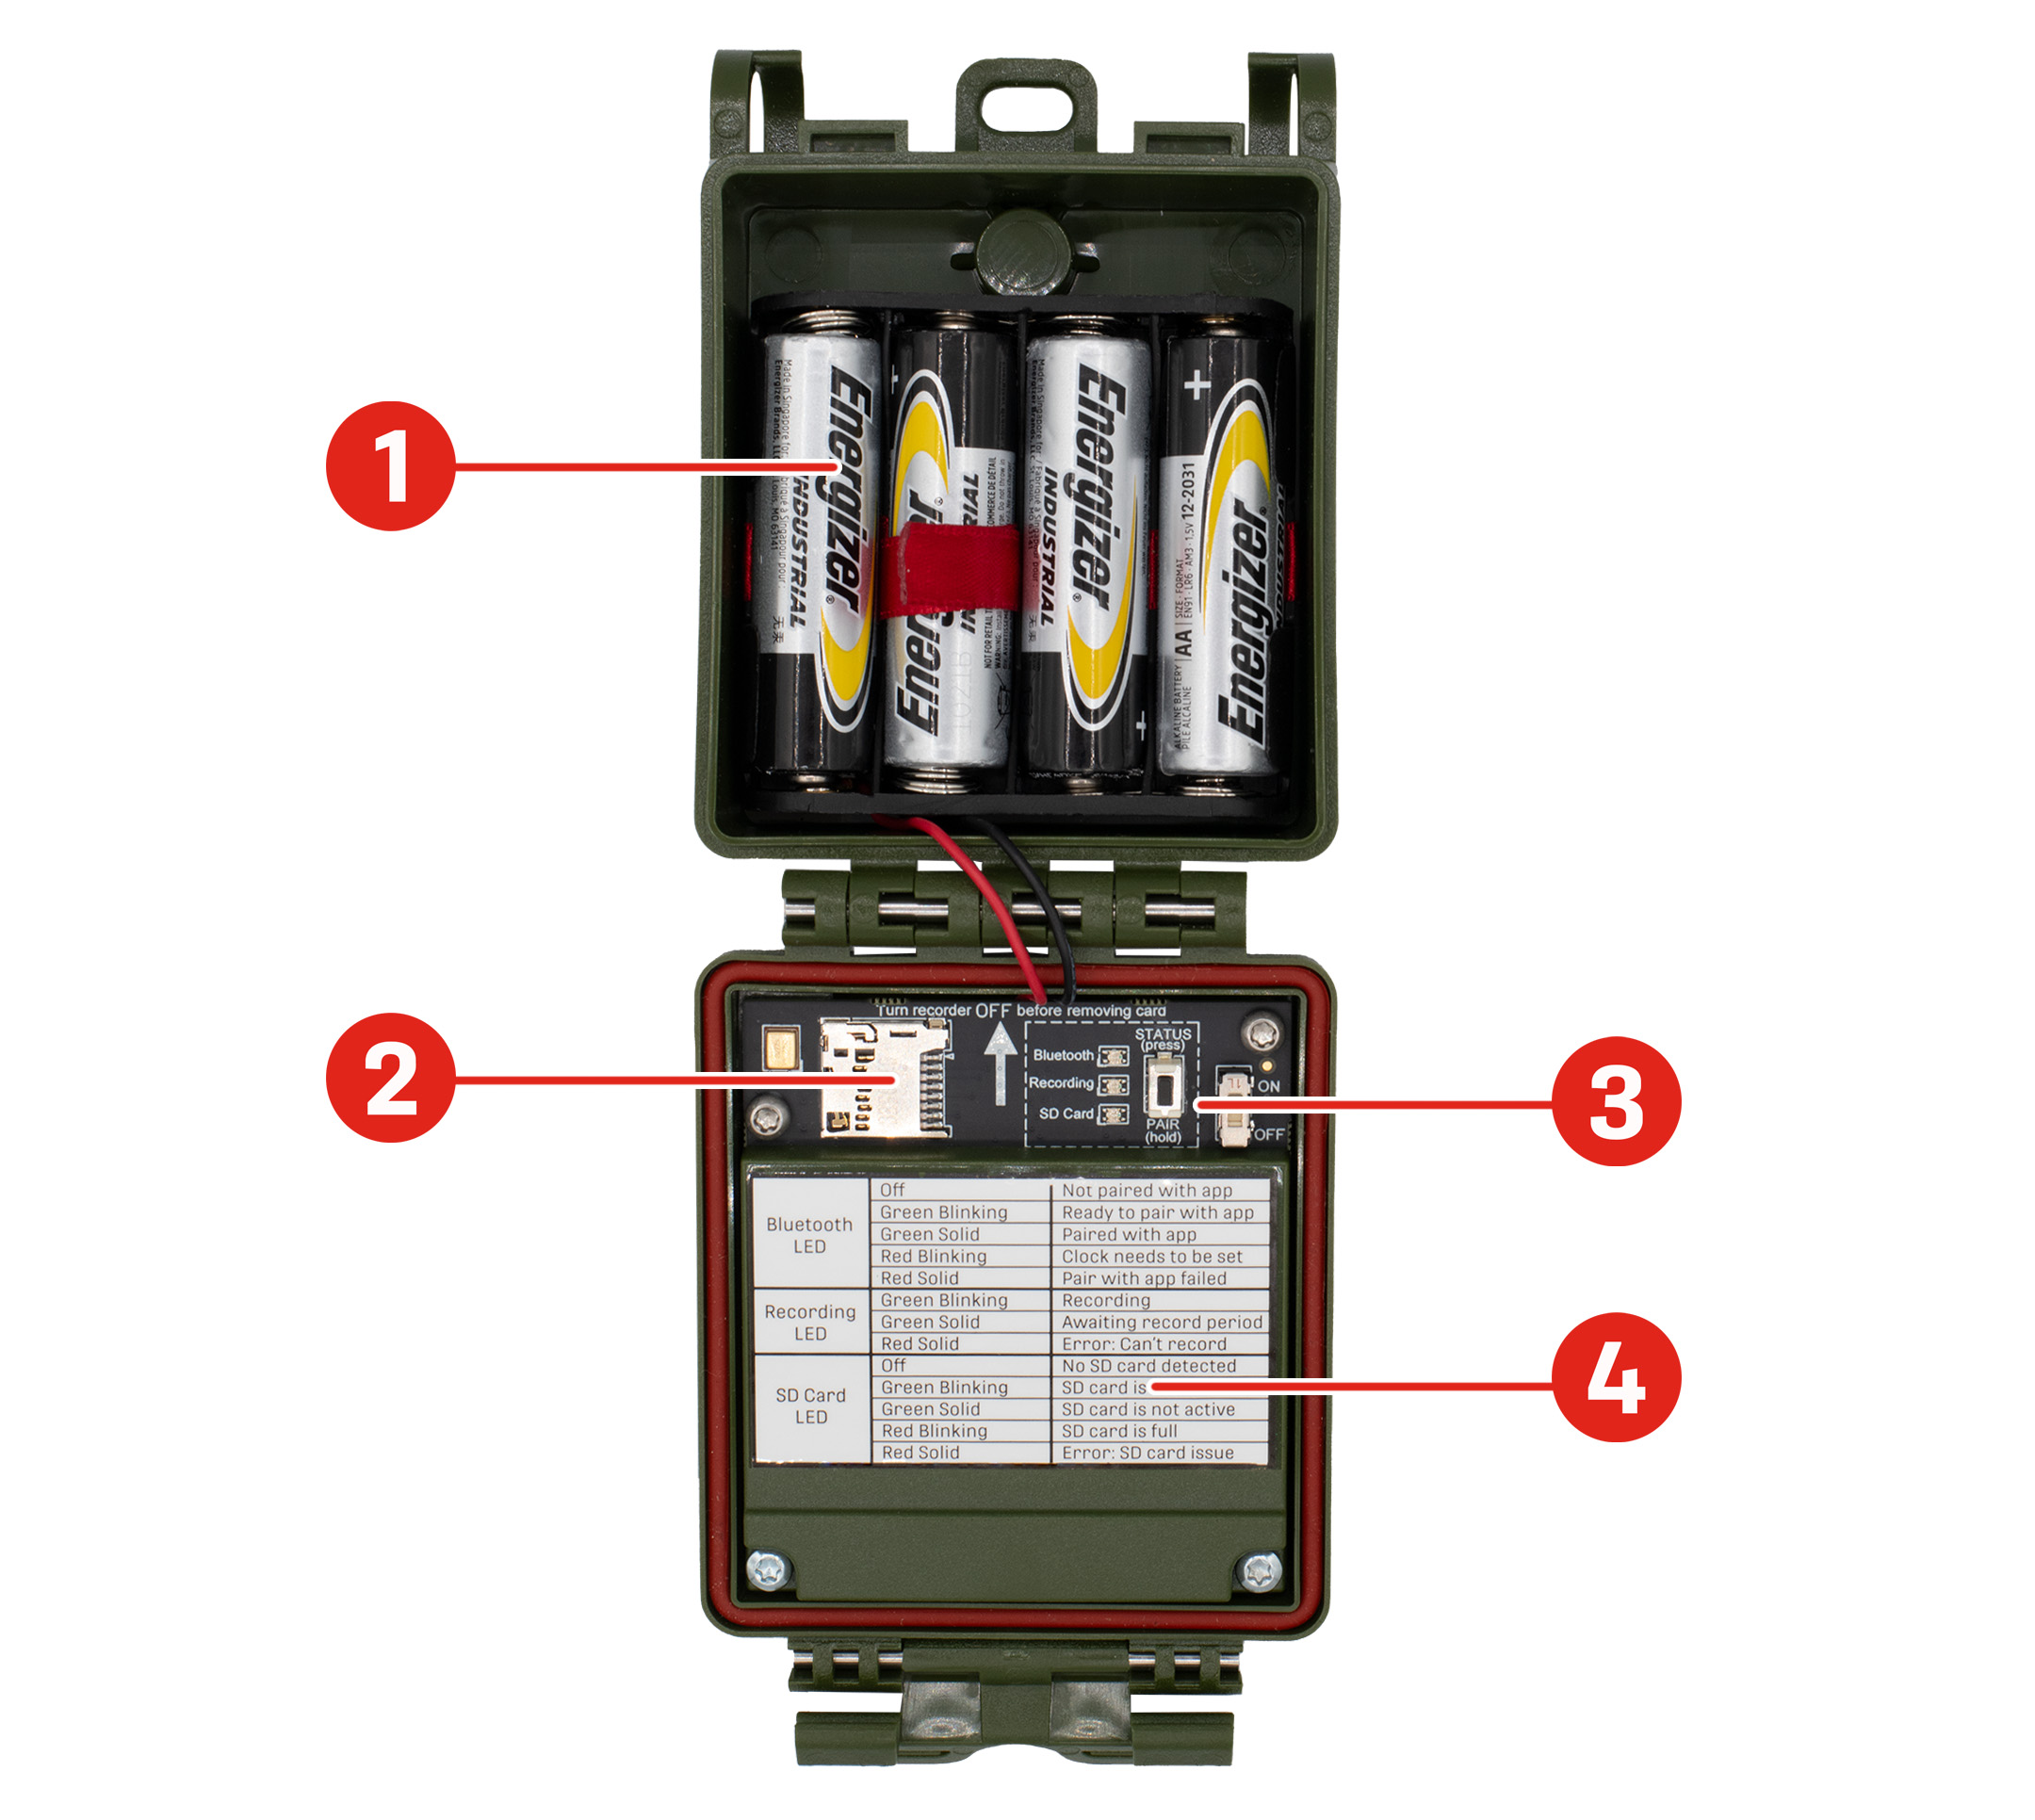
Internal Features
-
The AA Battery Compartment holds four AA batteries.
-
The microSD Card Slot holds a microSD card with a capacity up to 2 TB for storing recordings and other files.
-
The Control Panel is where you'll find several basic, physical controls. See Control Panel for a detailed image of this section.
-
The Status LED Key provides a guide for understanding the STATUS LEDs. This table can also be found under STATUS LEDs.
AA Battery Compartment
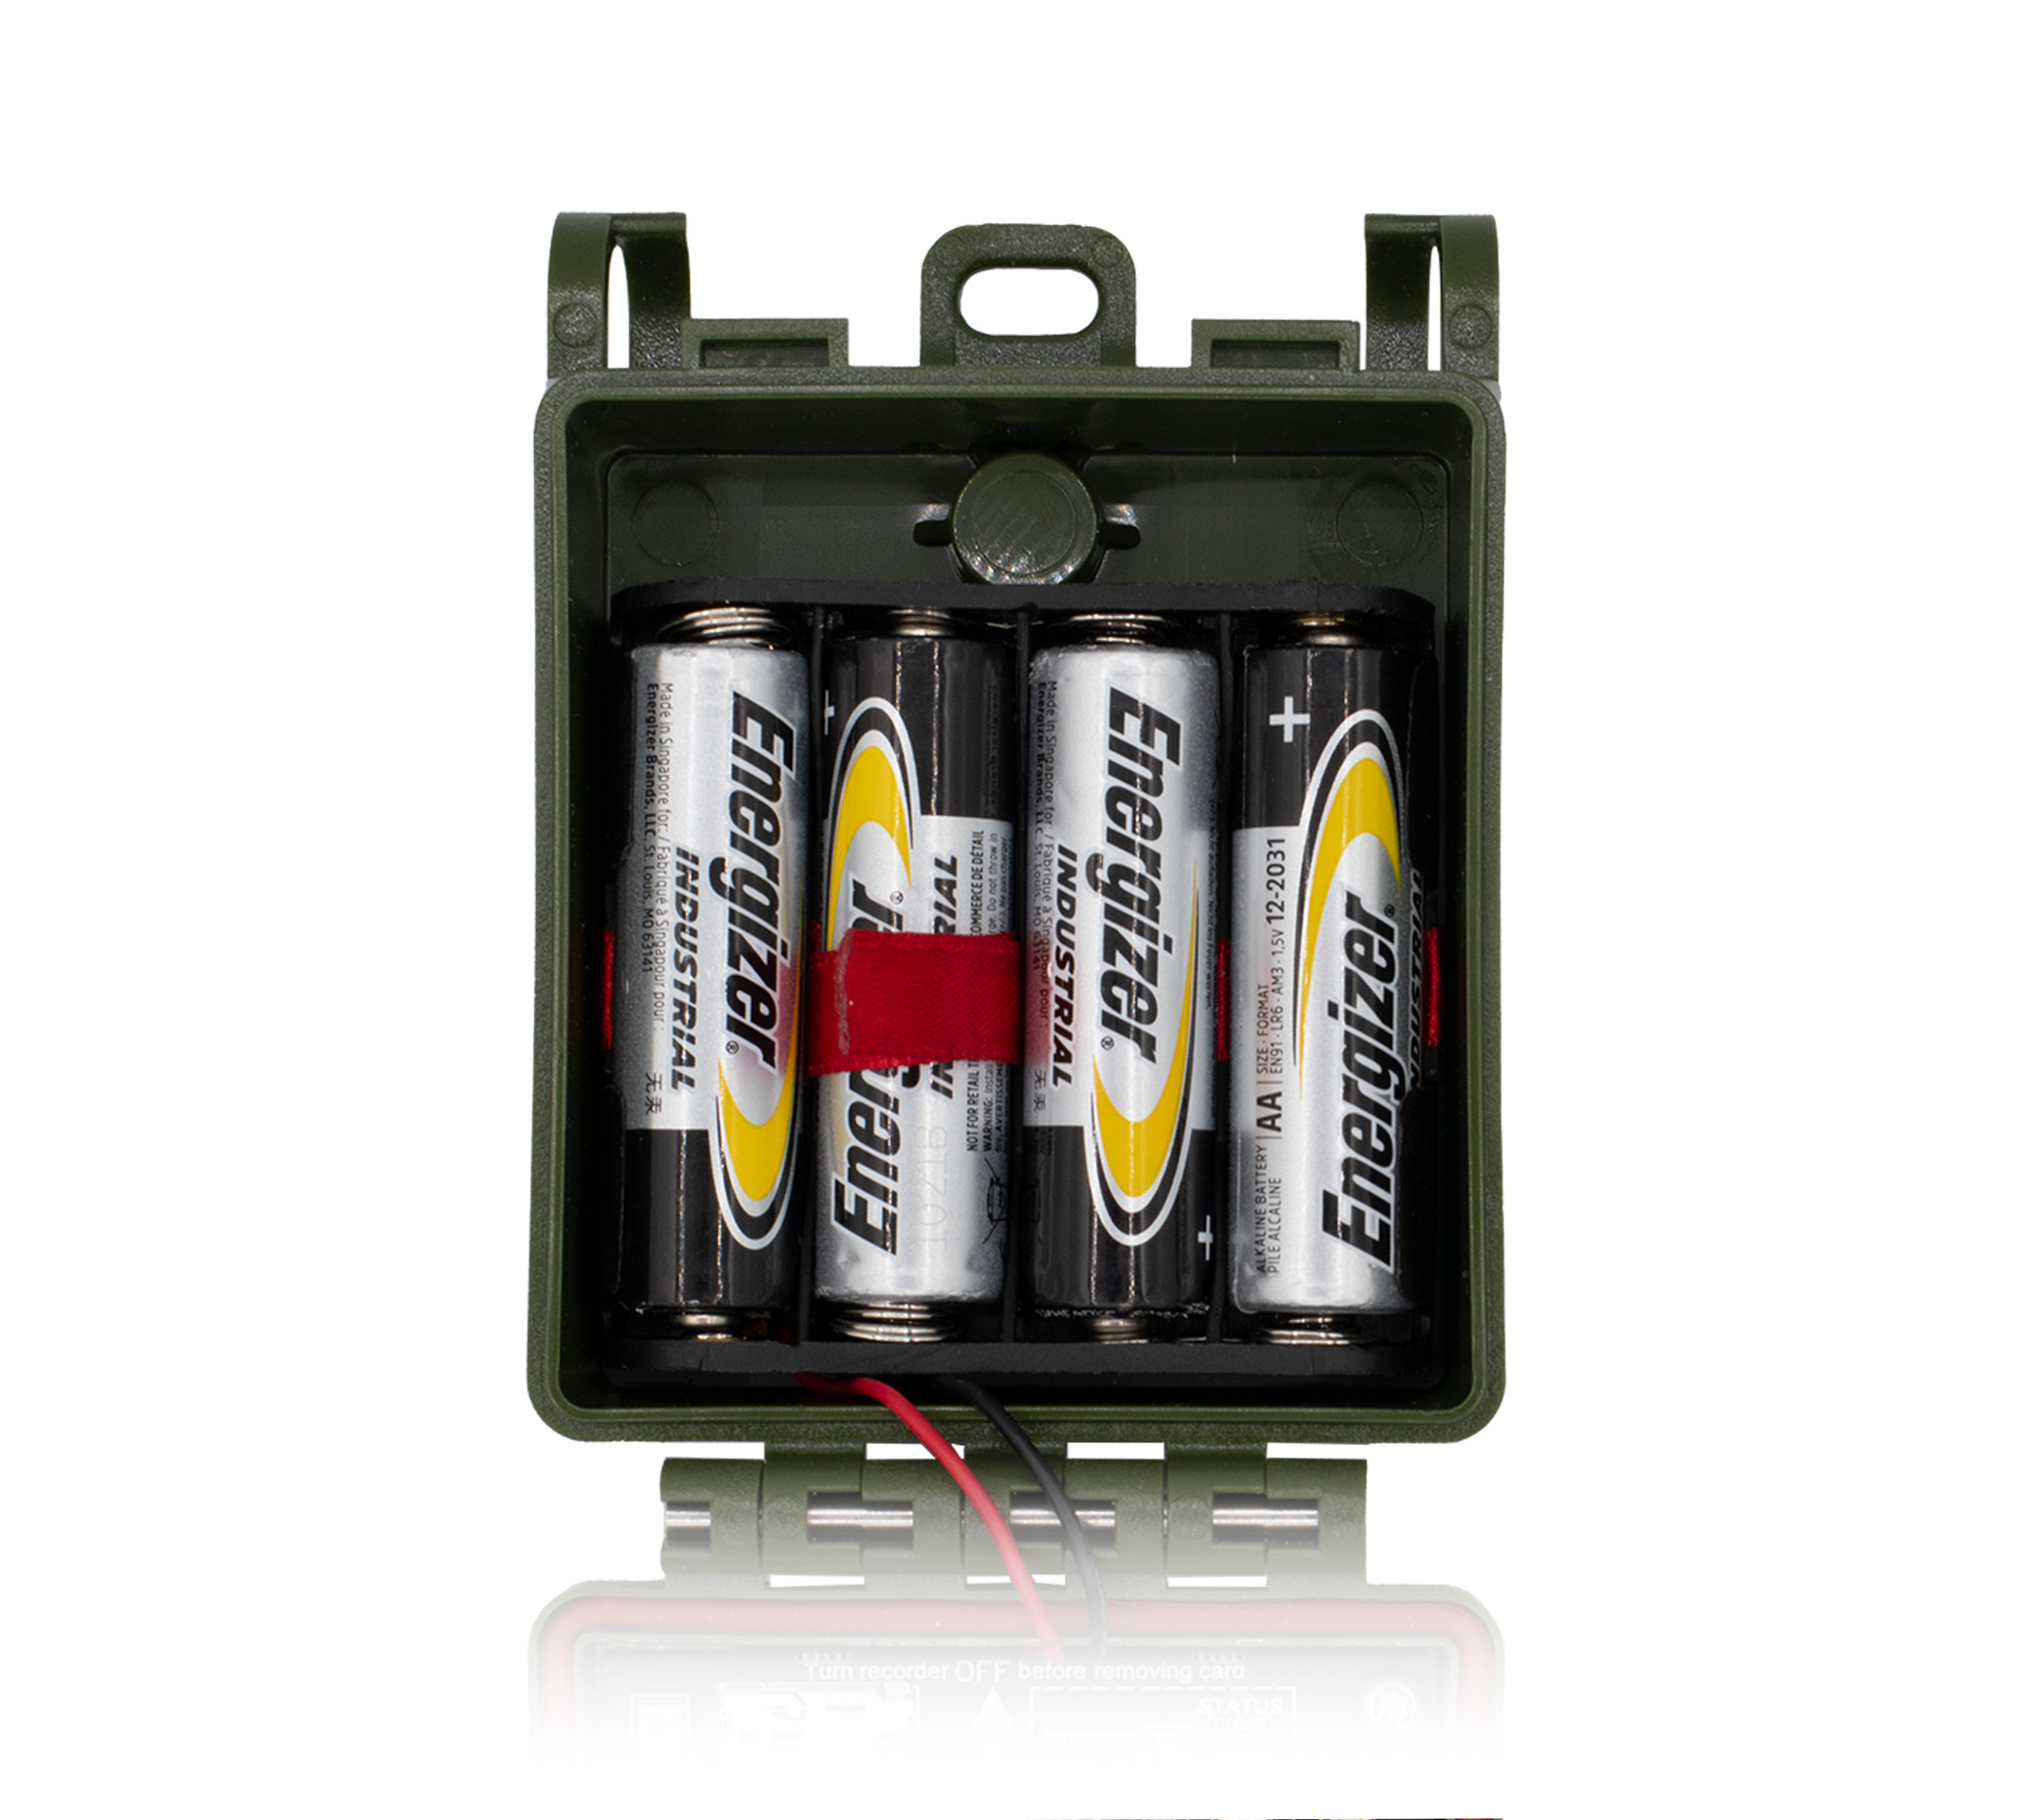
The AA battery compartment holds four AA batteries. All four batteries must be installed in order for the Song Meter Micro 2 to turn on.
The battery compartment has two ribbons fastened to the left and right edges of the compartment. Each ribbon should be positioned behind two batteries, with the free ends visible in between the middle two batteries. To easily remove the batteries, pull on the free ends of the ribbons.
For information on the different types of AA batteries, including Energizer® Ultimate Lithium™, see Types of AA Batteries.
AA Battery Insertion Order
When inserting batteries, start near the attached end of each ribbon at the outer side of each tray and work towards the free end. This will ensure the ribbon has enough slack to make room for each battery. Without enough slack, the ribbon may push batteries out of the tray.
Best Practices for AA Batteries
Improper battery use can permanently damage your recorder. Always take care to follow these guidelines.
-
Do not mix new or freshly charged batteries with used or uncharged batteries. A single dead battery will prevent the entire set from functioning.
-
The recorder will lose power prematurely and may not power on at all.
-
Batteries may leak corrosive chemicals that can damage the recorder.
-
-
Do not mix multiple types of batteries (e.g. combining alkaline with NiMH). All four batteries must be of the same type.
Ideally, all batteries should be of the same brand and model. Mixing batteries with different characteristics can produce unpredictable results.
-
Ensure batteries are oriented correctly. The negative, flat end of the battery should contact the battery tray spring.
If one AA battery out of eight is inserted backwards, the Song Meter Micro 2 may power on, but a backwards battery will eventually leak corrosive chemicals that can damage the recorder.
-
Ensure batteries are oriented with the correct positive/negative polarity.
microSD Card Slot
The Song Meter Micro 2 recorder saves recording files and a summary log to a microSD card installed in the memory card slot.
To insert a microSD card, slide it into the slot until it clicks into place. To remove, gently press the card further into the slot until it clicks again, and let the internal spring mechanism eject the card.
-
Only remove the SD card after setting the power switch to OFF and waiting until all Status LEDs have turned off.
-
Use the Song Meter Configurator app to check recording space available on the SD card.
"SD Card" and "microSD Card"
Language in the Song Meter Configurator app and in this documentation may use the term "SD card" generically. This refers to both the full-size SD card used by the Song Meter Mini family and the microSD card used by the Song Meter Micro family.
The Song Meter Micro 2 only supports the use of microSD cards.
Recommended SD Card Brands
Wildlife Acoustics recommends the SanDisk® brand of SD cards for their superior performance. Kingston® and PNY® are also suitable.
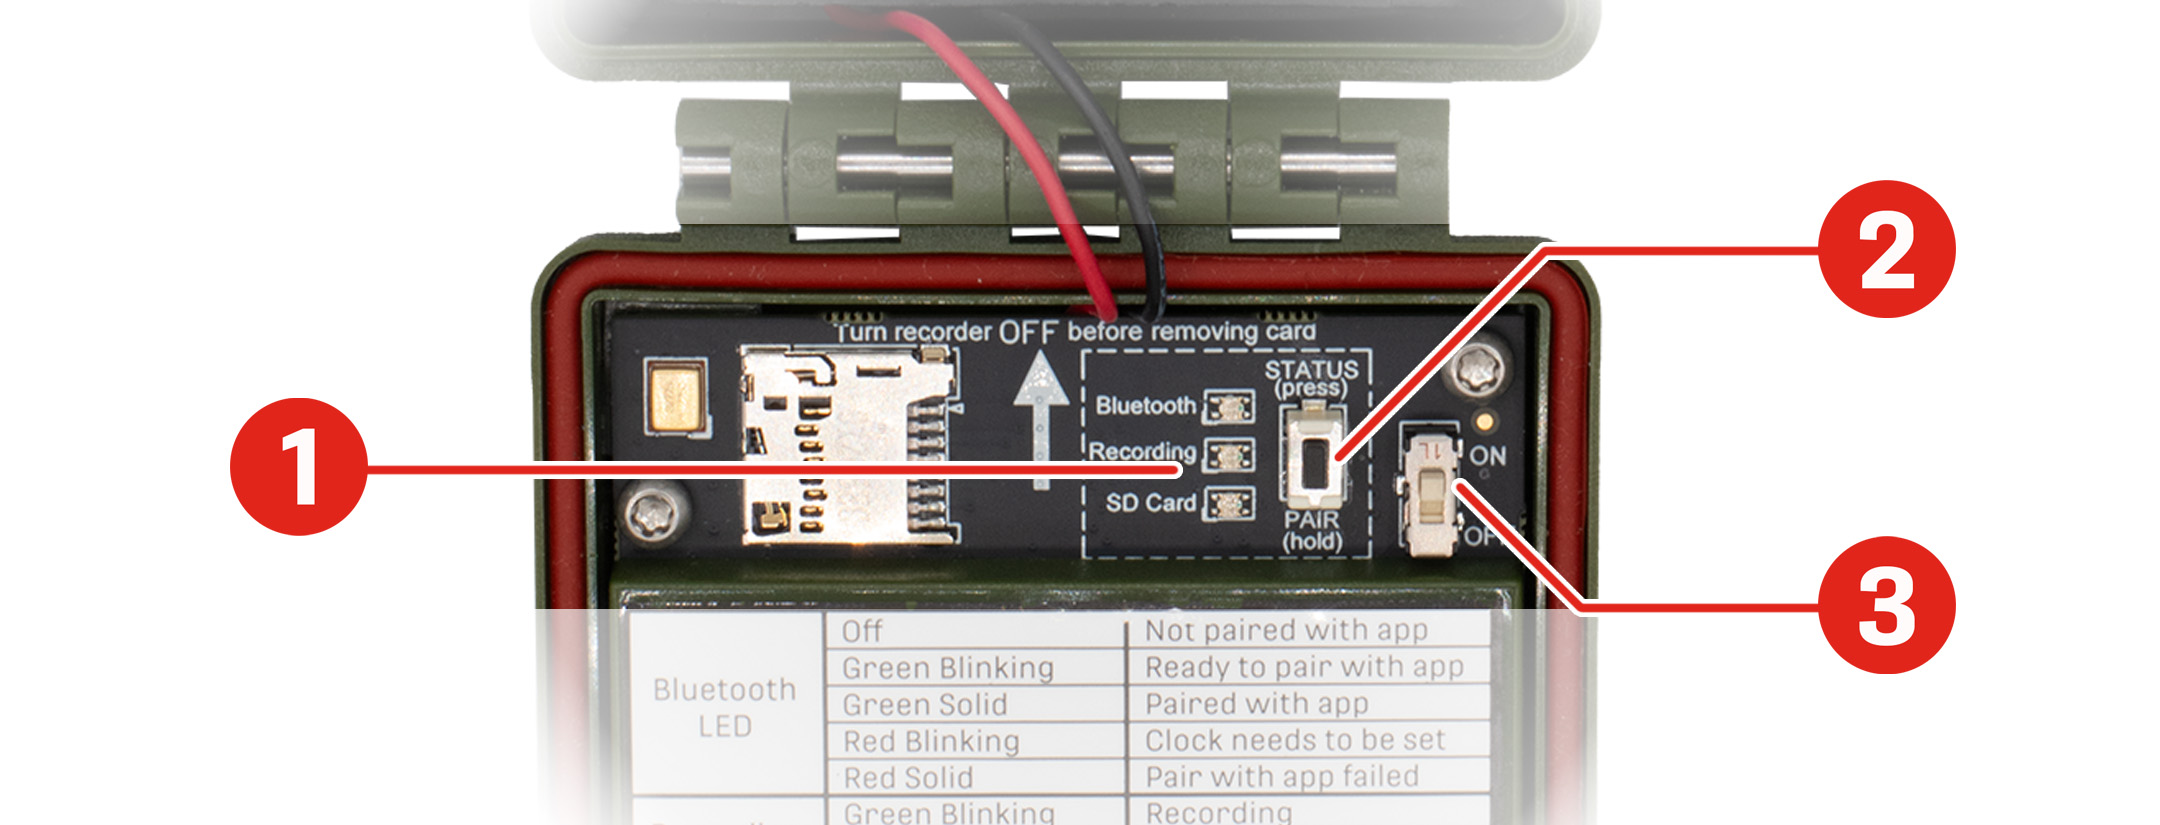
Control Panel
-
The STATUS LEDs provide visual feedback on the recorder's Bluetooth, Recording, and SD Card status. See STATUS LEDs.
-
The PAIR/STATUS button serves two functions:
-
Press and hold the button to initiate pairing with the Song Meter Configurator app. See Pair the Recorder with the Song Meter Configurator App.
-
Press the button briefly to activate the STATUS LEDs. See STATUS LEDs.
-
-
The ON/OFF switch powers the recorder on or sets it to a low-power, idle state. See ON/OFF Switch.
STATUS LEDs
The three STATUS LEDs on the recorder provide Bluetooth, Recording, and SD Card information.
The STATUS LEDs remain active while the recorder is paired with the Song Meter Configurator app.
The table of STATUS LEDs definitions, below, is also found inside the recorder’s lid for reference.
|
LED Label |
LED Activity |
Status Meaning |
|---|---|---|
|
Bluetooth |
Off |
Not paired with the Song Meter Configurator app |
|
Green Blinking |
Ready to pair with the Song Meter Configurator app |
|
|
Green Solid |
Paired with the Song Meter Configurator app |
|
|
Red Blinking |
Clock needs to be set |
|
|
Red Solid |
Pairing failed |
|
|
Recording |
Green Blinking |
Recording |
|
Green Solid |
Waiting for next recording period |
|
|
Red Solid |
Error: Cannot record |
|
|
SD Card |
Off |
No SD card is detected |
|
Green Blinking |
SD Card is active: do not eject |
|
|
Green Solid |
SD Card is inactive: safe to eject |
|
|
Red Blinking |
SD Card is full |
|
|
Red Solid |
Error: SD Card issue |
ON/OFF Switch
-
ON (up position): Full power is enabled. Schedule is started.
-
OFF (down position): The recorder enters a low-power idle state. Schedule is stopped.
When the Song Meter Micro 2 recorder is first powered on, the STATUS LEDs show Bluetooth, Recording, and SD Card status. If the recorder is unpaired and its buttons are not touched for one minute, the LEDs will turn off.
When the Song Meter Micro 2 recorder is switched off, it goes through a routine to end and save any current recording. This can take a few seconds.
This process means it is safe to set the switch to OFF at any time.