Install a Second Microphone
About this task
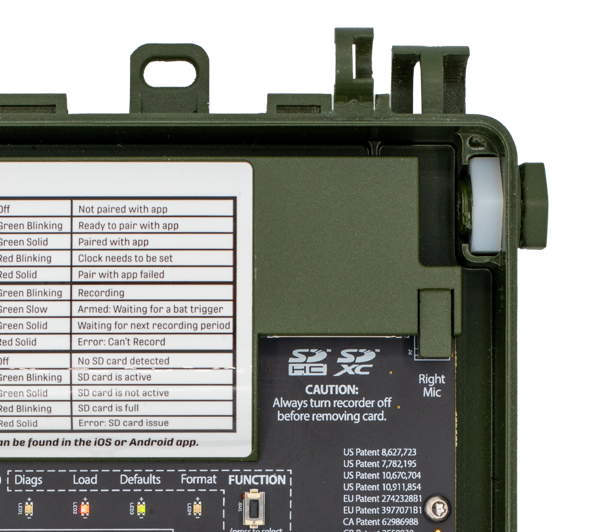
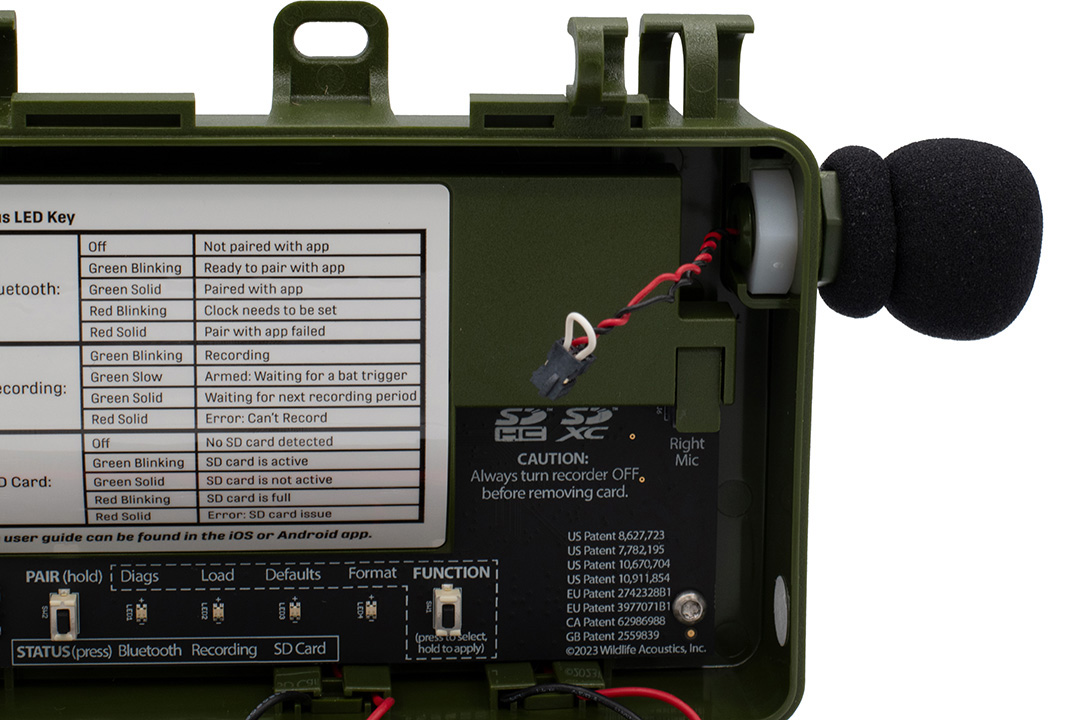
The Song Meter Mini 2 has a port available for a second, optional microphone, which you can install yourself. To do so, you'll need to remove the plastic hex bolt that occupies the Right Microphone port and install the microphone according to the steps below.
The optional acoustic microphone is designed for a one-time installation. It is not designed to be repeatedly installed and uninstalled. If the microphone is removed and re-installed multiple times, that could cause the connection wire to break, and the microphone will fail. Once the microphone is installed, it should only be removed if it needs to be replaced.
You can view a video demonstration of this installation process on our website (see Video Tutorials).
Procedure
-
Open the lid and place the Song Meter Mini 2 on a flat surface.
-
Use a 3/4" or adjustable hex wrench to gently loosen the bolt from the nut, then
use your hand to completely unscrew the bolt.
If the recorder is laid flat on its back, the internal hex nut will stay in place. The nut is necessary to secure the new microphone.
-
Thread the wire connector for the second microphone through the hole. Do not
connect the wire to the circuit board yet.
-
Hand-turn the microphone clockwise to screw it into the internal nut. Make sure the
microphone wires are not caught on anything as you turn the microphone.
Make sure the threads of the microphone align with the threads of the hex nut.
- When the microphone is finger-tight, tighten the microphone lightly with pliers or a wrench. Do not over-tighten.
-
Connect the plug at the end of the microphone wires to the socket labeled
Right Mic.
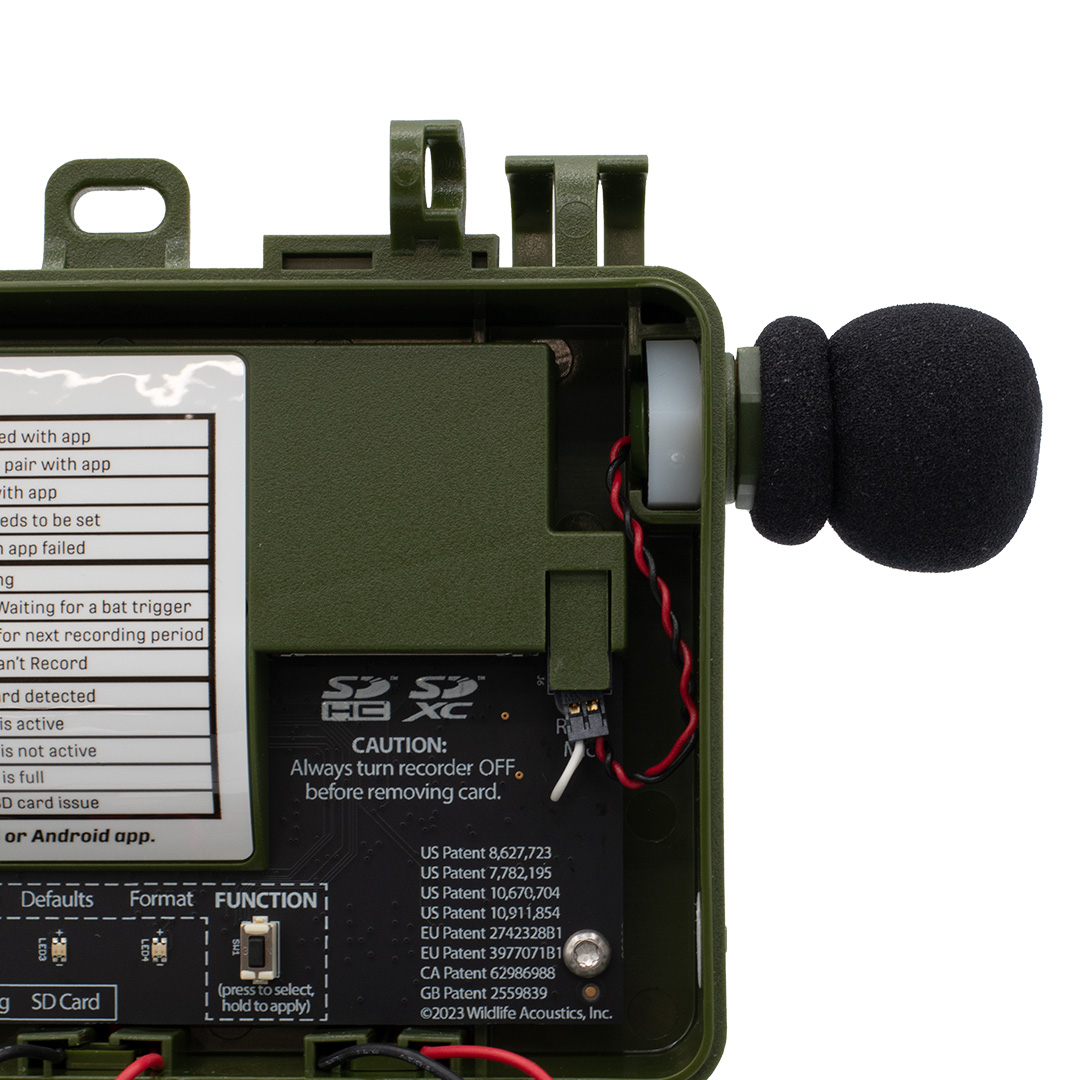
The plug has a key on one face that must align with a slot on the left side of the socket.
-
Route the wires to the right of the SD card to keep them out of the way of the
enclosure seal and to avoid electrical noise from the SD card.
The green plastic covering the front face of the SD card slot contacts the batteries when the lid is closed and holds them in place. Make sure the microphone wires are tucked to the right side of this plastic cover so they are not pinched between the plastic and batteries when you shut the enclosure.

Results
When the microphone is correctly installed, the recorder's Status screen will display RIGHT MICROPHONE: Attached. For info on how to view the recorder's status screen via the Song Meter Configurator app, see Check the Song Meter Mini 2's Status over Bluetooth.