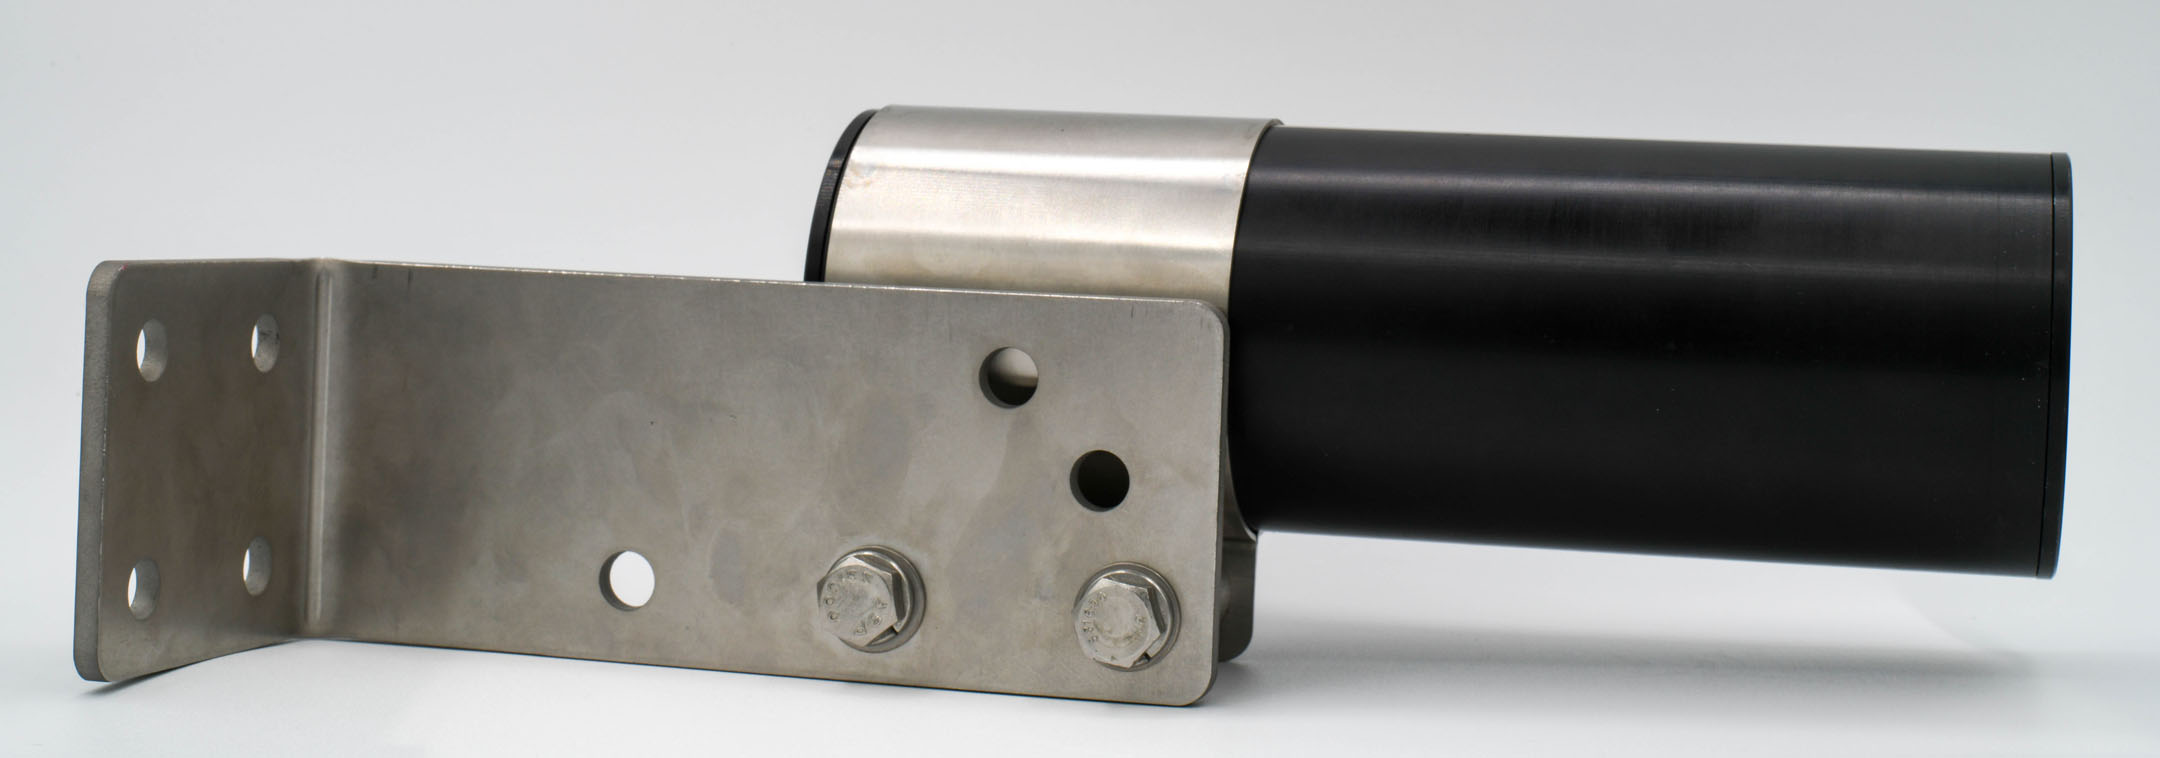
Orienting the SMART MIC-1 Mounting Bracket
The SMART MIC-1 Mounting Bracket has multiple mounting holes that allow you to angle the microphone in different ways relative to the bracket. The bracket can be used for through-hole mounting or external surface mounting.
Through-Wall Mounting
Through-wall mounting refers to mounting the microphone to the inside of a structure and pointing it through a hole in the wall so that its face is flush with the struture, facing outwards. When the face of the microphone is flush with the surface of a structure, it eliminates the possibility of recording reflections of bat calls bouncing off of that surface and increases the effective sensitivity of the microphone. Positioning the microphone face recessed or protruding from the flat surface will result in poorer audio quality.
When installing a microphone on a structure with wide, flat surfaces, such as a wind turbine, through-wall mounting is preferred to external mounting because the latter produces recordings with more prominent reflections. These reflections can overlap with the initial calls, reducing clarity both for human analysts and automatic call detection. Through-wall mounting is also preferred when it is easier to access the interior of a structure than the exterior.
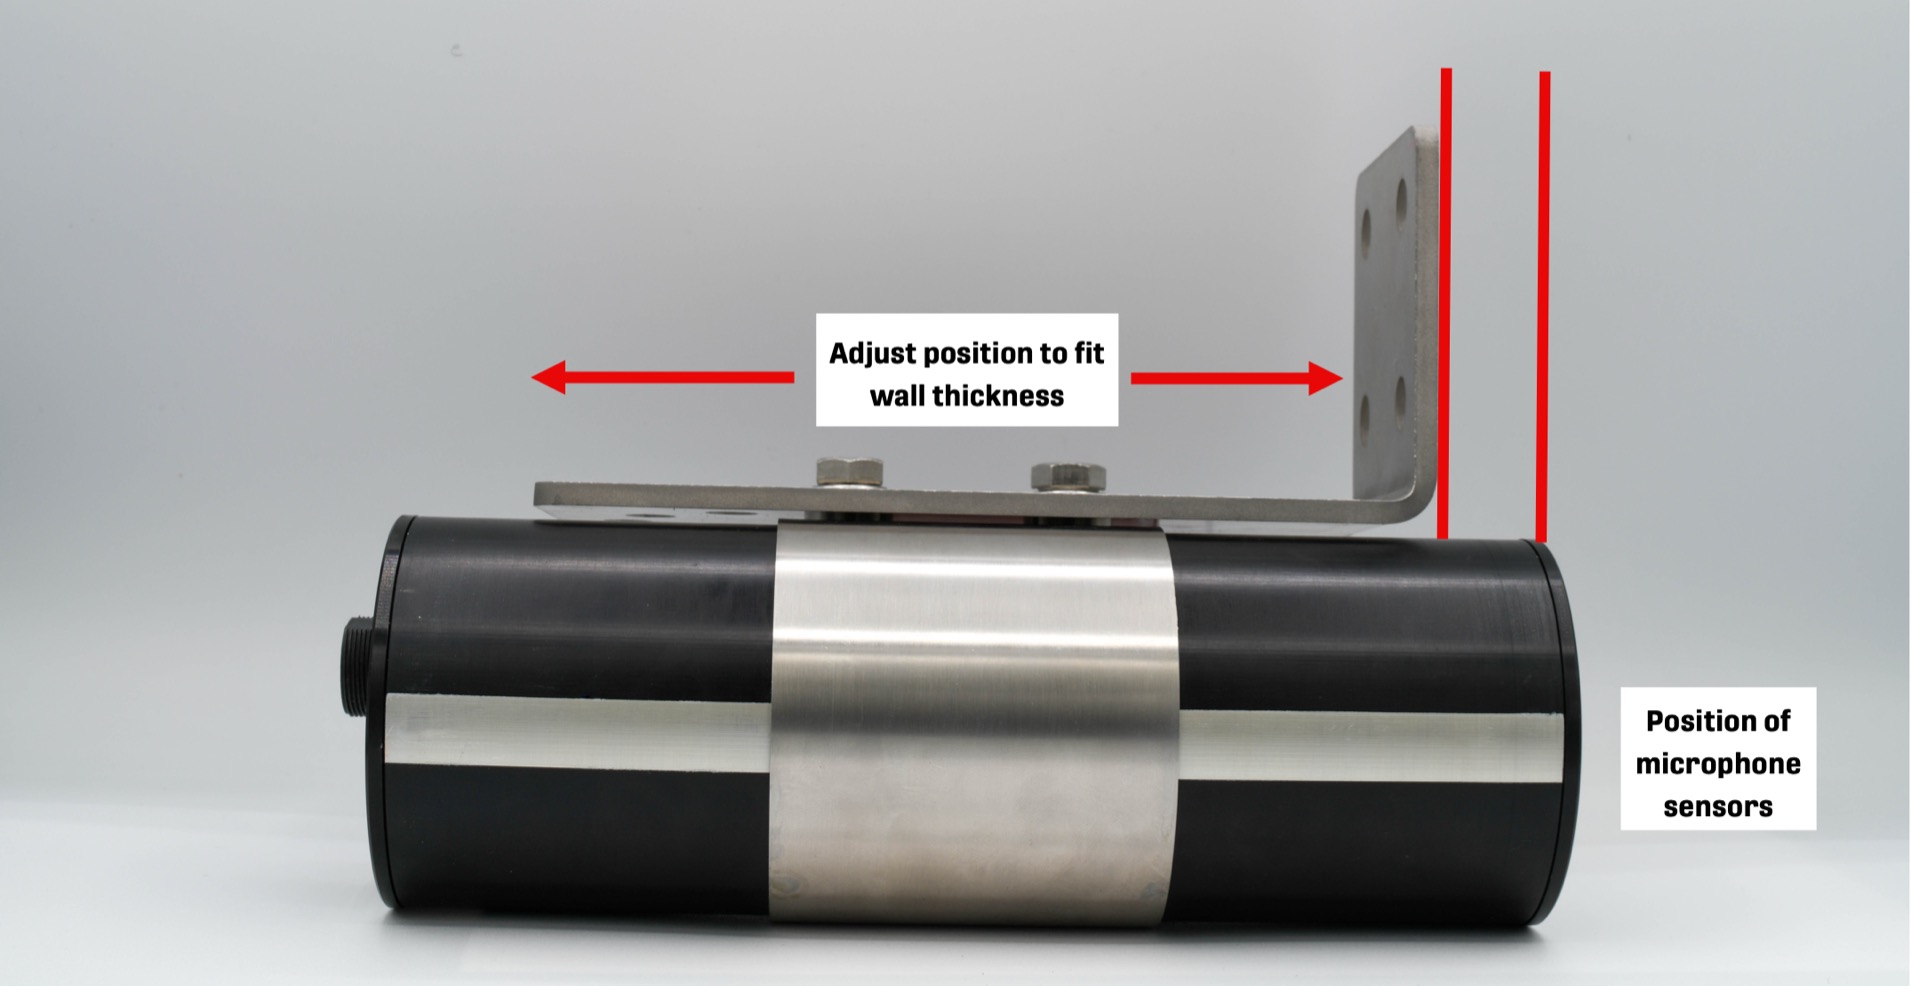
When you mount the microphone perpendicular to a flat surface, you can reposition the microphone in the clamp to account for the thickness of the wall.
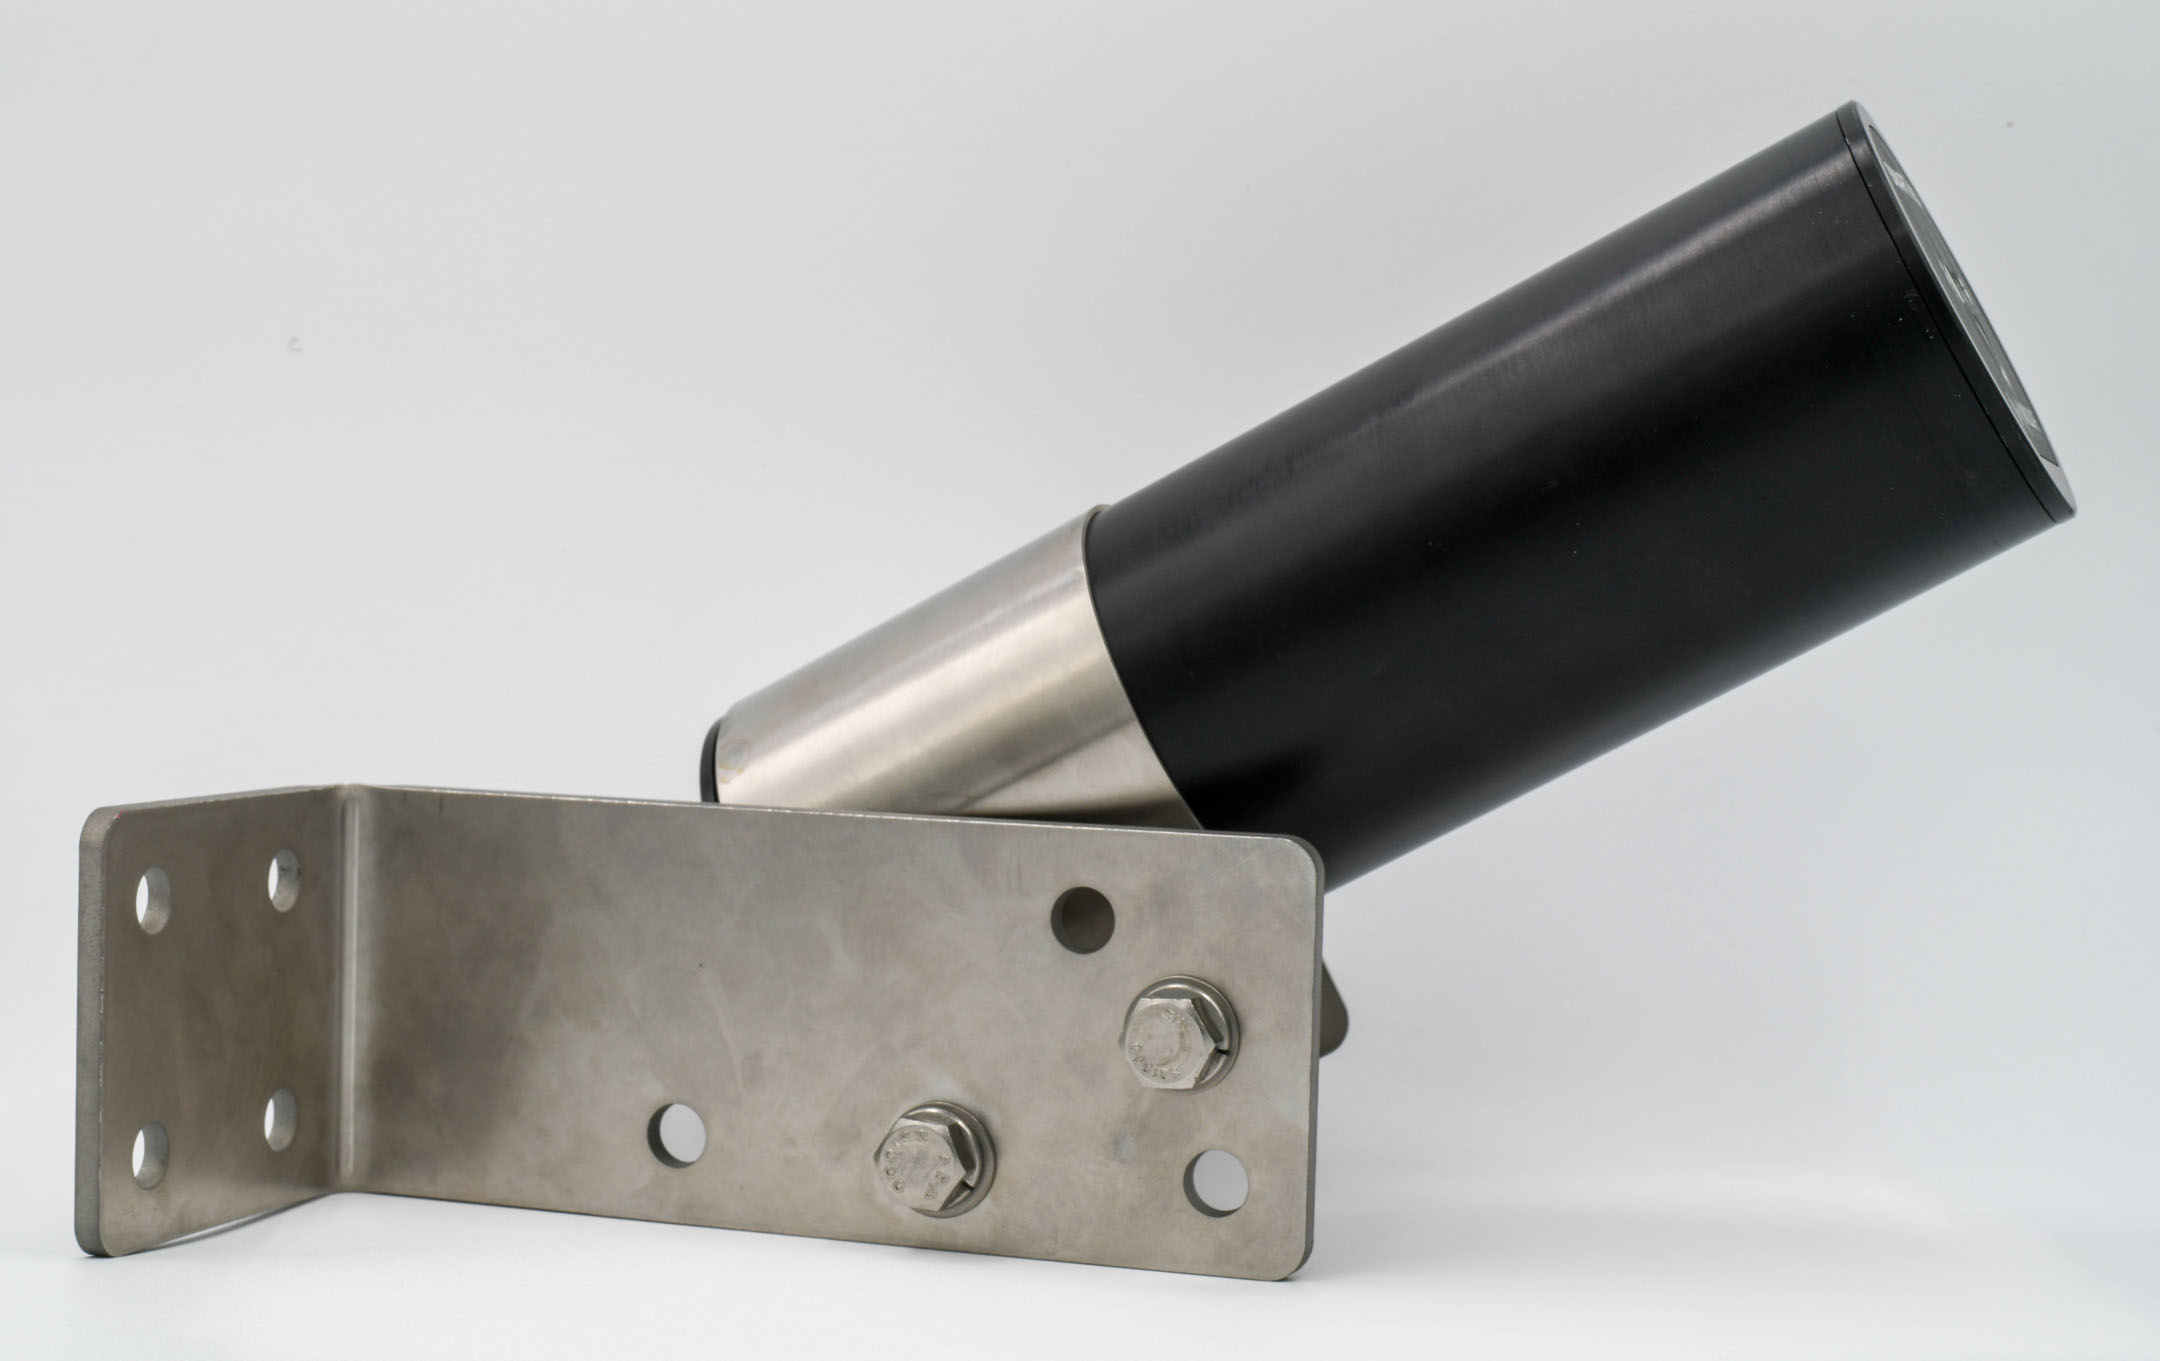
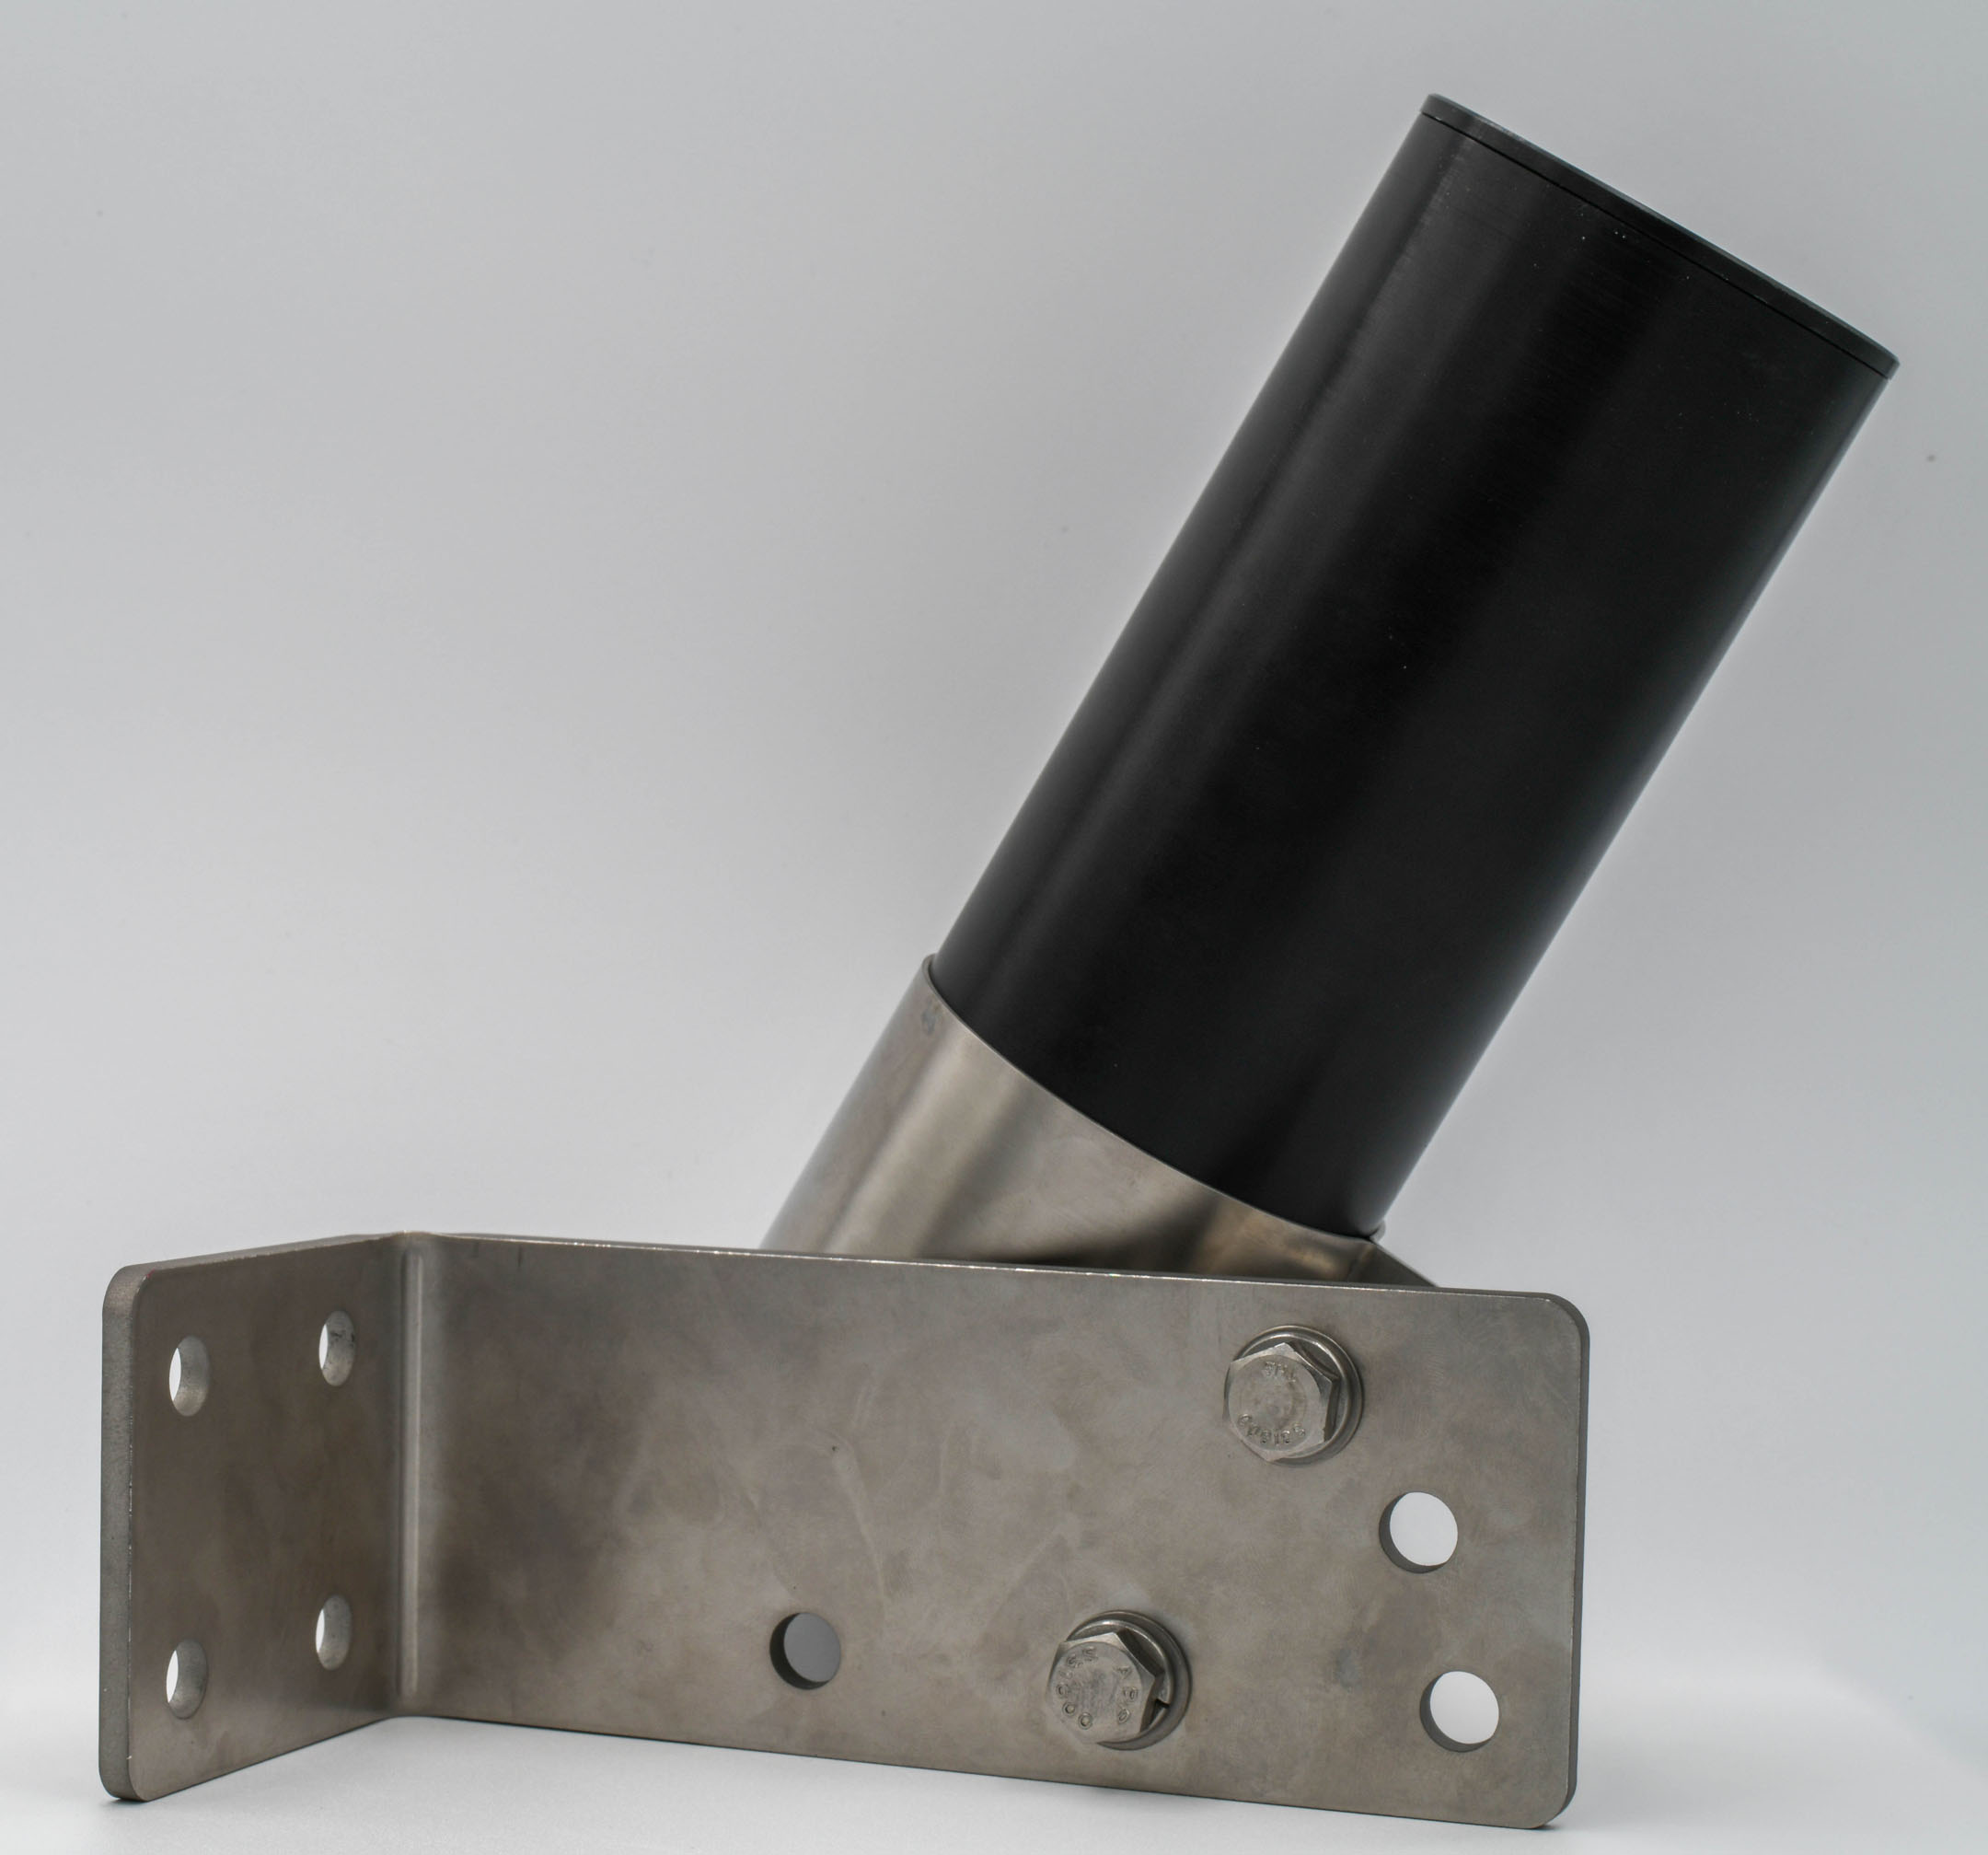
External Surface Mounting
When through-wall mounting is not possible, the Mounting Bracket can be fastened to an external surface. The microphone can be angled perpendicular to the mounting surface, 30° from perpendicular, or 60° from perpendicular.