Assemble the SMART MIC-1 Mounting Bracket
The SMART MIC-1 bracket can be quickly assembled by hand prior to installing the microphone on-site.
Before you begin
You will need the following components, included with the SMART MIC-1 Mounting Bracket kit.
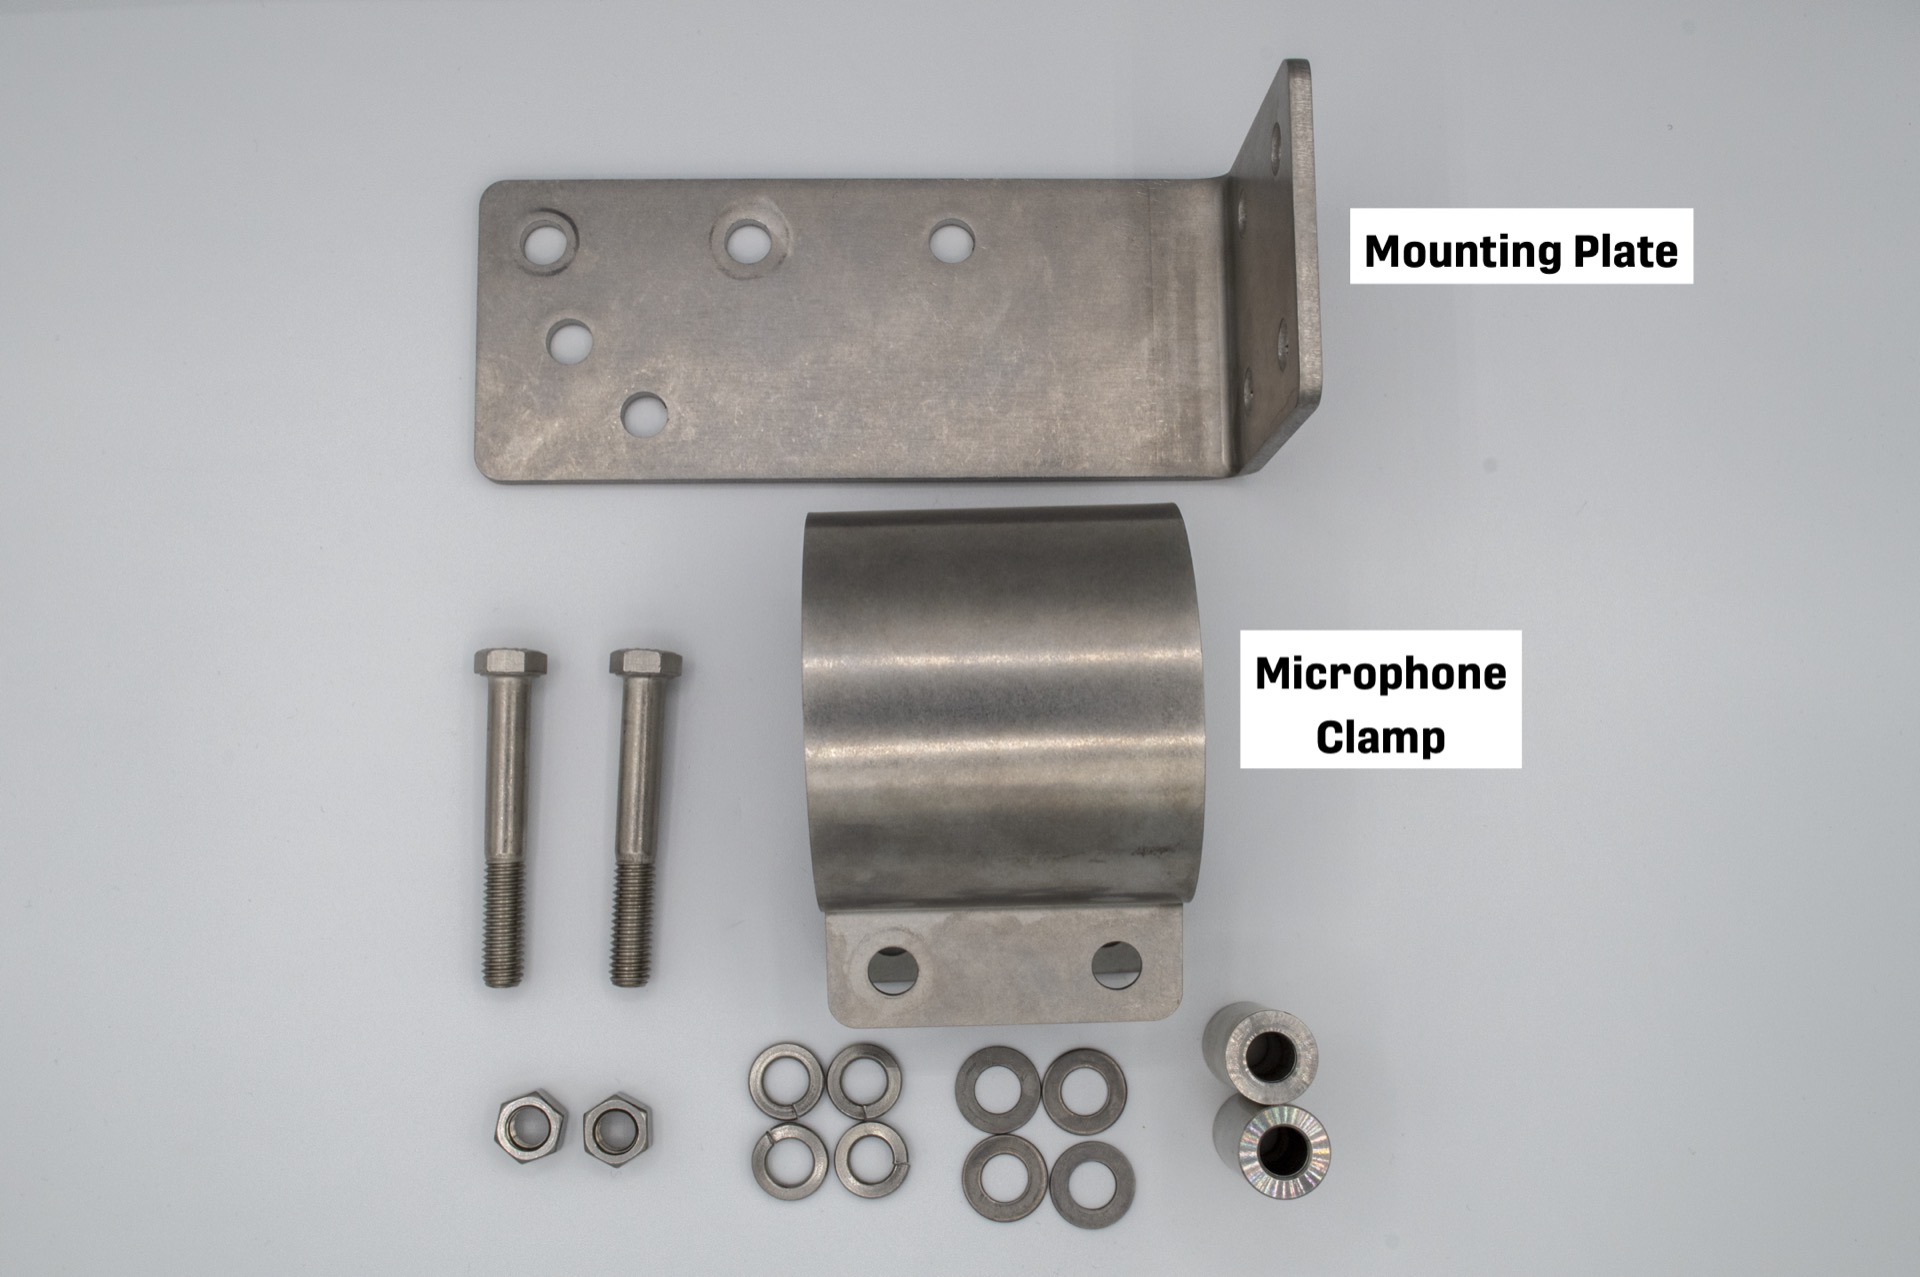

| Quantity | Part | Specifications |
|---|---|---|
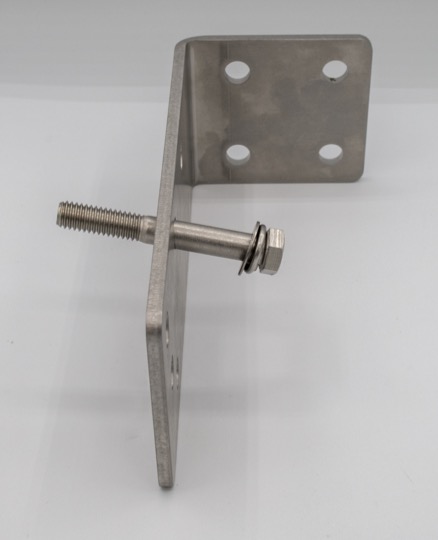
| 1 | Mounting Plate | |
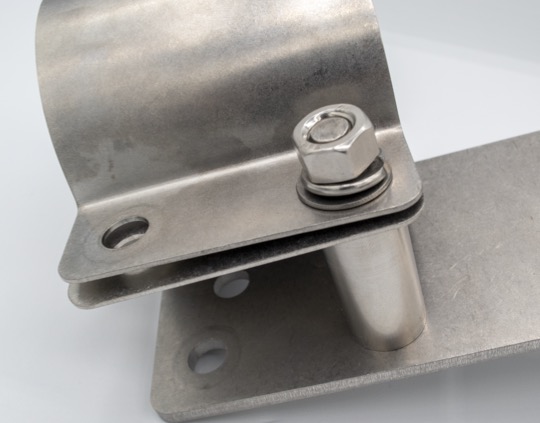
| 1 | Microphone Clamp | |
| 2 | Bolt |
|
| 4 | Lock Washer |
|
| 4 | Flat Washer |
|
| 2 | Cylindrical Spacer |
|
| 2 | Nut |
|
Procedure
-
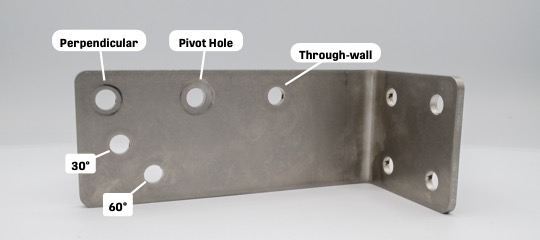
Decide which two of the Mounting Plate's holes to use based on the desired
mounting angle.
You should always use the Pivot Hole, in the middle of the Mounting Plate's longer face. The second hole you use determines the mounting angle.
-
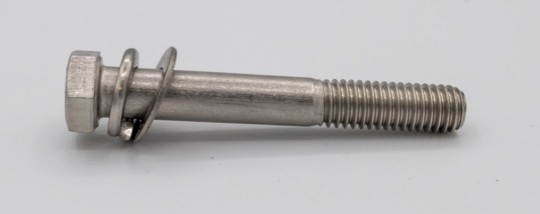
Slide one Lock Washer onto a Hex Bolt, followed by one Flat Washer.
-
Insert the Hex Bolt through the Mounting Plate through the first mounting
hole.
-
Slide one Cylindrical Spacer onto the Hex Bolt, followed by both flanges of the
Microphone Clamp.

-
Holding the Microphone Clamp closed, slide one Flat Washer and one Lock Washer
onto the bolt, then thread one Nut onto the bolt to hold the Microphone Clamp in
place. Do not fully tighten the nut yet.
- Repeat steps 2 through 5 for the second Hex Bolt and second mounting hole.
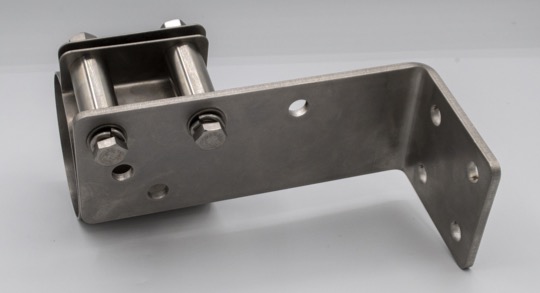
Example: Assembled Mounting Bracket for External, Perpendicular Mounting