Canadian customers finalizing 2026 budget: Check out our 100% Canadian owned and operated reseller, Canadawide Scientific.
Recording humans is relatively simple. Vocalists skillfully sing into the microphone, and studios have soundproof rooms and foam paneling to create perfect acoustic spaces. As a wildlife biologist, you face more challenging circumstances as you set out to record wild animal vocalizations.
For starters, while your subject might sing a fantastic song, they probably won’t hit the high notes on cue. And unlike an audio engineer, you won’t have complete control over your “studio.” That role belongs to Mother Nature, who often changes atmospheric conditions with little notice.
Fortunately, we have seven microphone selection and placement considerations that will help you capture your sound—come rain, wind, or extreme temperatures.

1. At what frequencies does your target species vocalize?
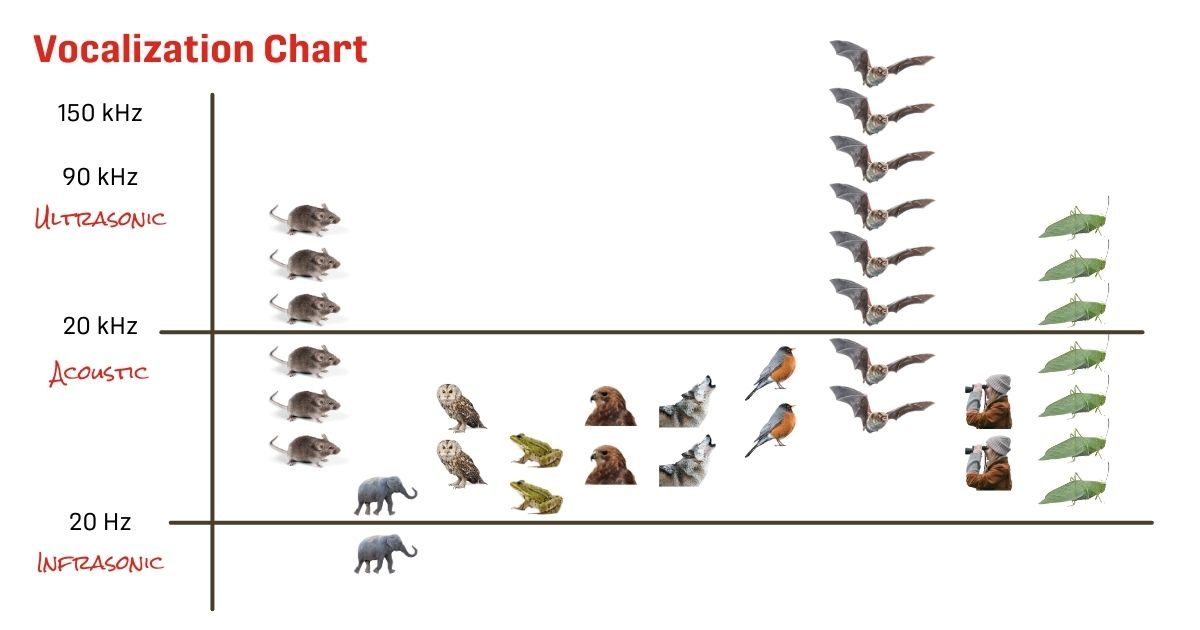
Where do your subject’s vocalizations fall on the sound spectrum? To capture sounds made by your target species, you will need recording equipment that has a microphone with the proper frequency response.
Can you hear it with your ears? Typically, calls, chirps, songs, hoots, howls, and other vocalizations within the 20 Hz to 20 kHz range are audible to humans (at least, those with younger ears!). An acoustic recorder is appropriate if your study animal falls into this category.
What if the sound is very high-pitched like the echolocation bats emit to locate insects? Humans cannot hear these frequencies, as they occur above 20 kHz. To be recorded, they require an ultrasonic recorder with a microphone that can capture frequency content within the ultrasonic spectrum.

2. How loud does your animal vocalize?
When considering where to position your microphone, you must factor in the amplitude, or loudness, of your animal’s call.
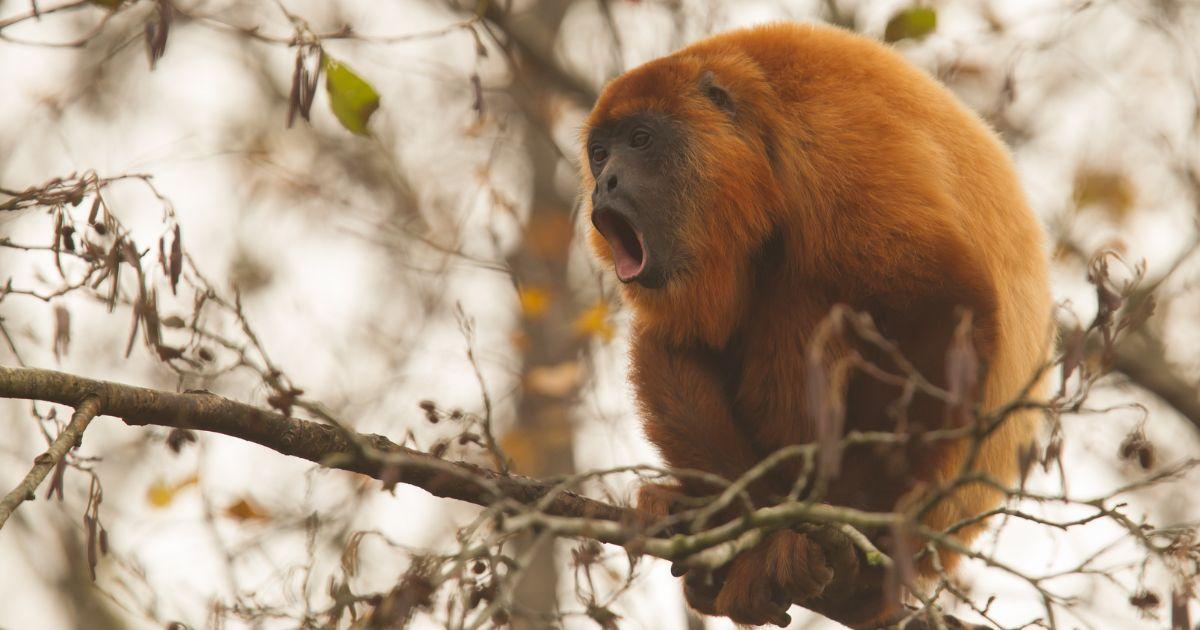
Say you’re studying Howler Monkeys, the loudest terrestrial mammal on the planet, with calls that travel for several kilometers at 140 dB (about the equivalent of a jet plane taking off next to you). Your recorder wouldn’t need to be as close to your subject as it would in the study of a bee, which creates much quieter sounds (around 40 dB) that travel just a few meters.
With acoustic recorders, a good rule is that if you can hear your subject, it will likely be audible in the recording. One caveat: For a sound to be discernible, it must be louder than the noise floor (the level of unwanted noise) across the frequency spectrum on which your recorder operates. How loud is the habitat in which you’re conducting your study? Are there frogs calling or a nearby river rushing that will interfere with recording? You can minimize unwanted and ambient noise by positioning your recorder away from such disruptions as much as possible.
Since few things produce sound at very high frequencies, this will be less of a concern with ultrasonic recorders, which are triggered only when ultrasonic sounds (like bat calls) are detected. Acoustic recorders, conversely, cannot operate on a triggered basis, as many noises are occurring across the audible sound spectrum at any given time.

3. Is there clutter in your recording environment?
“Clutter,” or objects in your recording environment—trees, bushes, water, rock faces, and others—are reflective surfaces off which sound waves bounce. This can be particularly harmful when recording ultrasonic bat calls because the associated sound waves are too small to go around many objects.
Imagine entering a gymnasium and clapping your hands. The sound leaves your hand, hits a reflective surface (the wall), and comes back as an echo. That echo then continues to bounce off the ceiling and walls until the sound runs out of energy. As this continues, your clap no longer sounds like a discernible, unique event, but a diffuse wash of sound.
As in this example, if echos in your recording are prominent enough, they will overlap and interfere with the actual call. This can turn a sharp and distinct bat call into a smeared mess. In some instances, an echo can cancel out the waves of the original call, creating literal gaps in the call shape. Both of these will throw off Bat Auto-ID and can make a manual vetter's job more difficult.
For this reason, physical objects—particularly hard, flat surfaces near your recorder—should be avoided when recording ultrasound. Testing your microphone to ensure it’s positioned to not create echoes and hinder your efforts is a good idea.

4. Are you recording rainy or humid conditions?
Let’s start with the obvious: Rainfall creates ambient noise. The pitter-patter of raindrops alone might make it difficult to analyze your recording.
Another factor is rainwater blocking your microphone. Any water that collects on the microphone’s face will muffle incoming sound until it evaporates. Two simple solutions to this problem are to mount your recorder upright so that its built-in microphone(s) point horizontally and to cover cabled microphones, such as the SMM-U2 (used with the SM4BAT FS), with large windscreens to wick water away.
Perhaps less obvious is that atmospheric moisture also impacts how sound travels. Because water is more dense than air, it creates a higher-density atmosphere where low-frequency sounds might travel faster (and high-frequency sounds might not travel as far). This effect is even more exaggerated with bats due to a phenomenon known as atmospheric attenuation.
When considering where to place your microphone, remember that rainy, foggy, and humid conditions can all affect your ability to detect at a distance.

5. Are you recording in a windy environment?
Windy conditions can create a few issues, the first of which is how far animal vocalizations and other sounds carry. Excess wind can also distort recordings, making it challenging to detect your target species (or much else).
Fortunately, you can do a few things to mitigate this. For starters, ensure your microphone is not facing directly into the wind. It’s also important to remember that if your subject is downwind of the microphone, its vocalizations have to fight the wind to reach the microphone. Sounds traveling in the direction of the wind will carry further.
You can place extra-large windscreens over your recorder’s existing windscreens for buffeting, and you may wish to apply a high-pass filter on your Song Meter. Because wind generates mainly lower-frequency noise, a filter that allows only higher frequencies to pass through can reduce its impact on your recordings.
If the wind still overpowers the microphones after implementing these tactics, try lowering the gain in your recorder’s settings menu. This will create more room for wind to be recorded without distorting the entire recording.

6. Are you recording in high temperatures?
As with any electronics, extreme heat can damage your recorders. Check your user guide for exact specifications on how your recorder is rated, and ensure it isn’t exposed to temps above the specified threshold.
Remember that the temperature outside might not reflect the temperature inside your recorder. Consider where your recorder is mounted: if placed in direct sunlight, it will heat up faster and to a greater degree than if placed in a shaded, breezy area.
Last, UV exposure from direct sunlight can break down microphone windscreens over time. Even if they turn brown (a normal occurrence), windscreens are effective until the foam begins to flake, at which point you may wish to replace them. We recommend ordering extra microphone windscreens when you purchase your equipment, as it saves on shipping and gives you backups in the field.

7. Are you recording in low temperatures?
On the flip side, if you study animals active in cold weather, your recorders may need to endure freezing temperatures and snowy or icy conditions.
We build our recorders to operate in temperatures as low as -4 °F (-20 °C). However, temperatures below this can damage components, so you should plan to bring your recorders indoors before a big freeze hits. (Keep in mind that batteries drain faster in colder temps.)
There are some ways you can mitigate temperature swings. For example, some scientists use cabled microphones to keep their recorders in insulated coolers during temperature swings. (One researcher in Antarctica buried his units to keep them warmer!)
Ready to get started with your study?
Contact our Sales Team to learn more!
